A purl stitch looks just like the back of a knit stitch. If you purl every row, you get a bumpy texture, which is exactly like a knitted garter stitch.
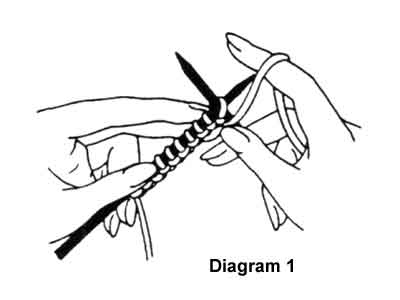
Insert the needle into the front of the stitch from right to left. (Diagram 1)
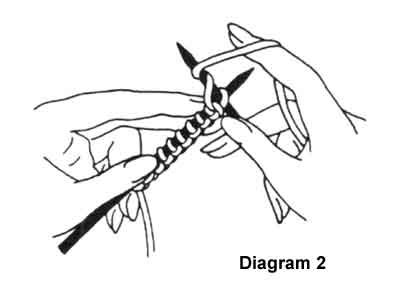
Wrap the yarn around the right needle. The yarn will still be at the front of your work. (Diagram 2)
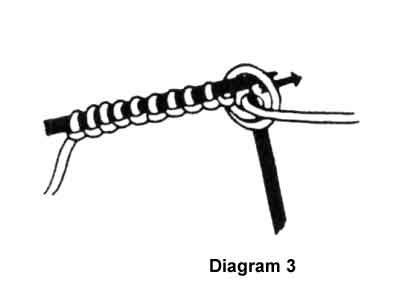
Slide the right needle down, and then bring the tip from front to back through the stitch, bringing the yarn with it.
(Diagram 3)
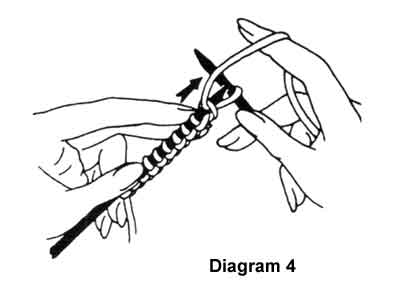
Slip the old stitch off the left needle. You now have a new stitch on the right needle. Notice that at the beginning and end of each stitch, the yarn is at the front of your work. (Diagram 4)
© Reprinted with permission from Craft Yarn Council's Certified Instructors Program (www.craftyarncouncil.com)